Where to Aim Your Microphone

You know where to aim your microphone, right?

The obvious and no-nonsense answer is right at the source of the sound. If the sound is coming from this point, stick a mic right in front of it… obviously. It’s a no-brainer. Show a Neanderthal how a microphone works to make his voice louder and he’ll eventually stick it in front of a frog to see what happens.Singer facing a live microphone (Shure SM58)
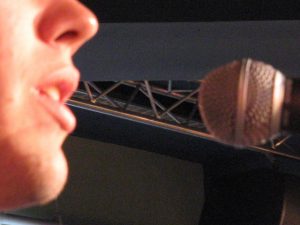
The problem is that studios, due to the nature of studio mics, tend to pick up a lot more sound than just what’s in front of the mic. With enough gain and an open studio door, I can hear my wife and her mother conversing in low tones in the kitchen (but don’t tell her that). Studio mics are sensitive, and that is to our advantage.

Of course, running your mics hot enough to hear a pin drop in the next room is going to give you a lot of background noise, so don’t do that in any professional production. But if you have a funky room that’s not exactly built for sound studio use, which is the situation most people in home studios find themselves in, then you can take advantage of the sounds of the room you’re in by recording off-axis.

What is off-axis recording?

What separates a studio mic from a live mic, in general, is that studio mics have larger diaphragms. The diaphragm is like a net that catches your sound. It does this by moving back and forth within a magnet, and moving the magnet creates a signal that sound boards and interfaces can use. All mics have diaphragms. It’s just that most live mics use a small diaphragm and shape the mic so that they pick up the sound directly in front of the diaphragm to catch the most sound right there. In a live performance environment, you don’t want a mic that’s going to pick up your vocals AND the vocals of the backup singer next to you AND the drums 12 feet behind you. Studio mics benefit from recording one thing at a time, when everything else around is silent. You can capture more of the room, more of the space, more of the natural feel of a voice in a room by making that diaphragm bigger and more sensitive.

However, having a large-diaphragm microphone can have its drawbacks: if you get too close to that sensitive net, a lot of sound is going to catch that diaphragm dead-on and flex a little more forcefully than you’d like. This is particularly bad with any ‘plosive’ sounds, your p’s and b’s, which are going to create a ‘pop’ in your sound as the magnet snaps instead of waves. A pop filter helps with this, of course, but why create the issue in the first place?
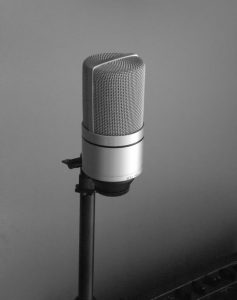
Studio mic facing off-center (MXL990)The other downside to recording close to a large diaphragm is that you add a lot of low resonance. Those mics will rumble if you let them. Most people back off the mic to get rid of some of that close resonance, but then you start playing a deadly game: the way you sound 3 inches from the mic is different than how you sound 5 inches from the mic, which is different than seven inches, which is different than a foot away… once you hear a recording that’s too close and you follow the general advice of “back up,” you start recording multiple takes at slightly different distances, and now you can’t piece them together to make a coherent narrative. Thankfully, there’s another way to control how that diaphragm picks you up while you stay close enough to keep your takes even: turn it a little bit.

Off-axis recording turns the micraway so that it captures your sound at an angle and can reflect a little, instead of catching the full force of your sound source (e.g. your bombastic voice).

I want to share a great example of this. A friend of mine who owns a pro studio upgraded his gear and picked up a $2000 microphone (which is insane but holy cripes it sounds clear as a bell), and he gifted me the Rode NT1-A that he started out with. So, naturally, the first thing I did was Google the Rode NT1-A for two reasons:

  1. What is this thing worth?
  2. What do other people say about this thing?

I was deeply curious. He just gave me a studio microphone. Did he just give me a sweet hookup or a lemon? Numbers are highly variable, I know, but mics that retail at once price are usually different than mics that retail at another price. What did I just get?

While sifting through reviews and other search results for this mic, I found a studio that did an in-depth review of the mic with multiple samples, and they talked in depth about recording off-axis with it. And of course, you’re able to replicate these experiments and results with ANY other large-diaphragm mic. The whole video is around 20 minutes, but you’ll start to find interesting bits about recording on-and-off axis around 2:53 — check it out.

So I know that the video was long, but hopefully you got to hear the difference between recording straight-on and recording a little off.

You can catch different timbres of any voice or instrument by knowing where to aim a microphone.

The key to this technique is to experiment relentlessly. Based on the room you’re recording in, you might find that there’s a great natural sound when you aim your mic 45-degrees off-axis and record facing the back wall but only two feet from the left wall. You might find that the funky corner makes things bounce in a cool way, which is great for voicing dragons (side note: if you get hired to voice dragons, please let me know). You may find that facing your mic directly away from the window but keeping in the middle of the room gives you the cleanest sound and plenty of room to record at a variety of angles. The point is to play with it, enjoy yourself, and get to know your sound by tinkering with who/where/how.

Use this technique in your studio and get some great recordings! Go do good work!


Joe
The Best Cheap Studio You Can Buy (from Amazon)

You deserve the best cheap studio you can buy.

I can give you a walkthrough on what gear you need and why, but sometimes the K.I.S.S. model works best: Keep It Simple, Sasquatch.

Here are links to the exact items you’ll need to get started with. As always, upgrade later. To get started, get these.

(Again, as a disclaimer: I do receive affiliate commissions from these links. It costs you nothing and tips me for providing good service. Thank you!)

Looks Like This Is Actually Called This Costs This Much
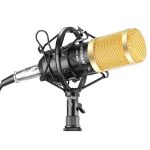
  BM800 Microphone

The best deal on a large-diaphragm starter mic anywhere. I’ve written about it extensively on other pages. Treat your budget. Start with this.

$18
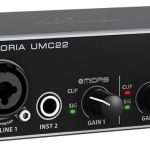
Behringer UMC22 Interface

There’s one $10 cheaper (the UM2) but the preamp is not as nice. This one has what you need to get started with. See other options here.

$40
10-Foot Mic Cable

You can save $1 by going down to 6 feet, but why? And you can spend an extra $7 and get 25 feet of cable to record from across the state, but again, why?

$7
Tabletop Mic Stand

You have lots of options here, but let’s start with one you can use in a couple of circumstances. Most tabletop stands are 12-13 inches tall. This goes over 20. And the boom arm angles the mic out to you! Can’t get better for the price.

$13
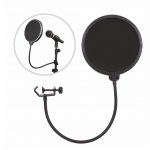
inexpensive pop filter Pop Filter

Make your p’s and b’s not explode and sound like an amateur! Everyone should use one of these unless you want to stand four feet from the mic and yell at it, and if you’re doing that, then this isn’t the hobby for you. (-:

$6
Total $84

Of course, anything that you already have access to can get you started and save you a little scratch. Check with your local church, they probably have something you can borrow. Mic stands, in particular, usually get moved to a closet and get forgotten.

Moving forward, you may want to pick up some headphones (usually around $20 to start) just to hear things clearly, but for the sake of recording your voice and sending it out to the world, focus on the capture of sound more than the tweaking of sound.

Lastly, as a reminder, shop around Amazon. Specifically, take a look near the bottom of each listing at the “similar items.” Once I saw a new brand selling the BM800 for only $10; they sold out within a week. Two months later, there was another new brand selling them for $13. Then the week after that, I saw someone selling for $9, claiming they had “better frequency response” than the other makers of the BM800. I can’t speak to that. I can speak to getting that mic for $9, though, heck yeah! (The deal went away; I can’t link you to it anymore).

Buy these. Get started. Do good work!


  • Joe

Tutorials

I desperately want to spend some time walking you through the recording process, capturing the best sound possible and making awesome mixes.

I absolutely love teaching people how to put their stuff together, tweaking mic placement and coaching the best ways to run gear together. I deeply enjoy shooting videos, making sure that we get the right angle to display exactly what you need. I’m fascinated by the gleam in a person’s eye when an idea really catches them, you know? I’ve shown so many people how to work with 3-band or 4-band EQ knobs on sound boards, and watching them grasp exactly what each knob does and how they can use it…  that spark that fires through them, it’s incredible. And I want to share that with many more folks than I’m able to in-person, so a video series on running sound and doing studio or live recording would be ideal.

The bad news: I don’t have the time to record all of the videos you deserve.

The good news: I am not the only human on the planet.

I think you should start with Graham over at RecordingRevolution.

Graham Cochrane has been doing professional studio work for over 15 years and has a lot to share with you, particularly on his YouTube Channel.

He has a series on getting started in the home studio which is fantastic. He also has video series on how to record from scratch, how to mix from scratch, and many other super-helpful series.

If you only follow one guy for learning how to use the gear you’re starting with, follow Graham. He won’t lead you astray.

His website also offers a series of free downloadable PDF guides that walk you through a lot of things, if videos aren’t your forte. One of those guides is for starting a home studio under $600. Skip that one. You’re here.

For the actual processes of recording, mixing, and mastering, you can’t beat Graham’s series. Check it out.

For deeper understanding on managing your DAW, I am a huge fan of following the MusicTechHelpGuy.

Now, a word of warning: almost everything he does is based in Logic Pro X, a paid-for DAW for Apple.

That being said, a good life lesson for you if you haven’t learned it already is that what you learn in one area or on one system very often translates into skills that apply elsewhere. In the studio world, this is more literal than in other places. For example, a class on improv acting can help you become a better negotiator in the workplace. A ballet course can teach a football player how to balance in strange positions and keep light on their feet. Studios are even simpler: adjusting gain and setting up buses works in every DAW. Learn your skills in Logic for free on YouTube. Apply your skills to literally any DAW worth its salt.

One of the most impressive things to me is that whenever I run into an issue or have a question, I will google my problem (i.e. “how to crossfade in Logic Pro X” or “how to sync framerates of video and audio”) and usually, his videos are on the first page of my search results. He has consistently shown me how to fix a multitude of problems.


There are more great resources, and I’m sure I’ll link more as time goes on, but to get you started, check out their work. It’s all great, and it will not be a waste of your time.

Go do good work.


– Joe

Getting Started: Recording at Home

Getting started recording on your computer

You’ve borrowed or purchased the gear, you’ve plugged everything in… now what?

Well, it’s pretty simple. You need software on your computer to receive sound from your interface. Thankfully, we can avoid breaking the bank with this, as well, since there is an outright free option. There are a number of free options, of course, with varying ability in each. For a full breakdown of current options across the board, check out this Wikipedia article. To just get started with right away, though, I’m going to recommend Audacity.

There are two types of software that you can get started recording in: the most common is called a Digital Audio Workstation, or DAW, while the second is simply referred to as a Wave Editor. Typically, a DAW is more complex but more versatile, used to mix a few (or a few scores of) tracks together. A Wave Editor, on the other hand, is fairly simple and deals with either a single track or just a handful of them.

Audacity is simple to get started with, completely free, and you will not regret tinkering with it.

(Of course, if you’re using a Mac, it already has GarageBand on it, and that will give you more options, as any DAW is wont to do. Even so, if this is your first time recording, I would encourage you to download Audacity and try some recording and editing in there. Think of it as Military Basic Training — wearing the uniform is cool, but if you don’t condition yourself do to things right the hard way, you may never appreciate the tools you’re given to make your job easier down the road.)

Download Audacity, install it wherever you like, and open it up. Tell it that your input is from USB, pick input 1 or 2 depending on where you plugged in your mic/instrument, and hit record. Say something. Stop and play it back. That’s you, homie. That’s you! Congratulations, you just started recording!

Now, as noted above, whatever you can beg or borrow from friends is useful. Once, my wife spilled water on our MacBook Pro and I ended up borrowing a 3-year old HP laptop from a friend. At first, I was frustrated and devastated that I couldn’t use GarageBand to record with anymore. I started with Audacity, later switched to Ardour, and eventually liked their work enough that I signed up to donate $1/month to the Ardour team as a thank you. I got a refurbished Mac a few months later, but I keep supporting Ardour because I like their style as a DAW and you might like it, too.

If you’re able to borrow an old MacBook from a friend, go for it, give GarageBand a try.

And lastly, let’s say for a moment that you don’t have a computer to record with, but you do have an iPhone, iPad, or Android device (I once did this with a Kindle Fire):

Getting started recording on your phone/tablet

My friend, I’ve been there. I know it’s not ideal. But it’s definitely something that can be done, and it can be done cheaply. In fact, not only can it be done cheaply, it is the epitome of buying cheap gear now and re-using it later.

As long as your device has a headphone jack (thanks, Apple…) get an iRig. They’re usually around $30, but because I’m such a unique and magnanimous fellow, I’ve linked one that’s only $10. If you’re particularly savvy, and willing to wait ~a month~ or so,  you may be able to find one on another website. I Wish I could remember the dot com that I purchased one on for $3 on a couple of years ago, but the name just seems to escape me… heh. (for what it’s worth, I later bought one on the same site for $4 when my brother-in-law started a YouTube channel, and when it arrived, it didn’t work. The company was unresponsive, and I’m not one to file a credit card dispute over $4, so I ended up buying another one for $5 from another vendor on that site. I should’ve just done Prime shipping on this $8 one, but I was being frugal and he was in no rush.)

Apple’s mobile devices offer a mobile-friendly version of GarageBand for free as a thank-you for using their devices. Android users will be able to find basic recording apps, as well. All you need is something to turn your mic signal into an instrument cable… man, it would be nice if your recording interface had a headphone jack you could use for that purpose BUT WAIT, IT DOES, OMG OMG OMG!

A leaky roof once ruined my home recording studio (you understand why I started this site, I’ve been through quite a few setups before), and I was forced to start almost from scratch. My laptop was fried and the studio-in-a-box recording module that I had at the time was waterlogged and completely ruined. My 4-channel interface and rackmount gear, sitting to the side of the desk, were the only things that survived. Sure, I could run my mic through the interface, but I had nothing to actually send the interface to…

…and that’s when I realized I could use the interface as a small mixer and record onto my phone.

At first, I tried plugging an aux cable in, but that didn’t work, because I forgot that phones use TRRS connectors which are capable of left earbud, right earbud, and microphone input signals. So I bought a cheap adapter. It crackled constantly, couldn’t get a clean sound out of it. Then I got a line-level adapter, which actually did fairly well, but lacked a little bit of the robust sound quality I wanted. Finally, a friend pulled out an iRig to run into his phone for clean audio for an event he was videoing, and it clicked: I could use that to record with, and with guitars, I wouldn’t even have to run them through my little system.

Of course, now I’ve twice touched on the secondary use for an iRig: getting good audio behind your videos.

Shooting video is a whole world of tutorial write-ups beyond what I’ve started here, and honestly, this has gotten long enough for you to digest. Suffice to say: a cheap iRig will get your nice audio into your phone for video use way faster and likely cheaper than many phone audio adapters available right now. I mean, I love the idea of the Rode mic you can clip on your device and plug in for great audio, but who wants to spend $100 on a phone mic?

If you don’t have a computer to record with, go ahead and get the computer setup. You still need a mic, and you can’t beat that price. That mic needs a device with phantom power, so you can spend $30 on the interface or $50 on the pre-amp, either way, and then you’ll need an instrument cable to go from either your interface’s headphone jack or your pre-amps output into the iRig, and record on your mobile device. Ta-da! You’re set up!

Now go make some great recordings!

Lighting with Edison Bulbs

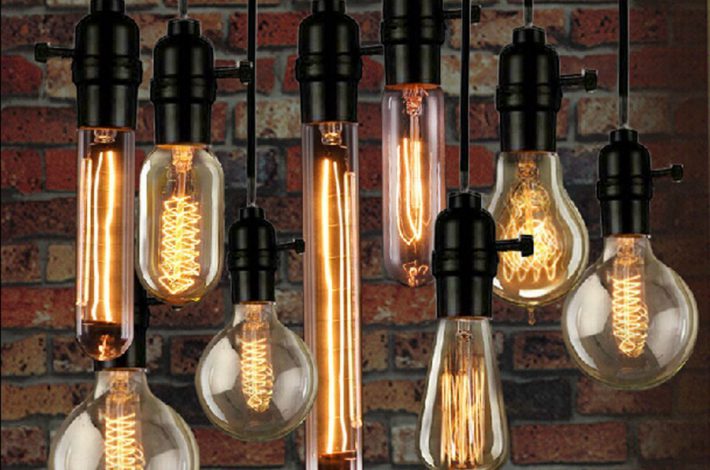
9 different bulbs

Okay, this is not a necessity. I’m just being honest, I’m sure you already have an overhead light or a lamp lighting up your recording area. Or maybe you’re near a window and using that giant cosmic lamp we call the sun.
But you like to record at night, don’t you?

And you like to have people over to your place every now and again, right?

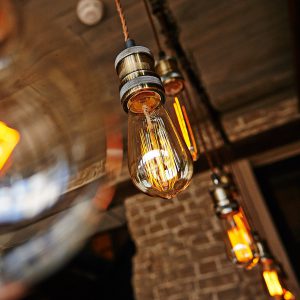
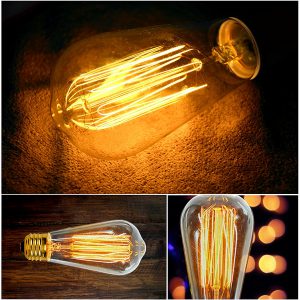
In which case you want your place to be stylish. And nothing quite says ‘tasteful artist’ as quickly as lighting your space with edison bulbs does.

Our church recently set up a worship space and we wanted the atmosphere to be warm and inviting, so we invested in some edison bulbs with some lamps we purchased at Goodwill. They looked great, so I thought to myself, “I’d really like to get some Edison bulbs for my lamp at home. But dang, lighting can get expensive at [insert local building supply store here].”

So of course, I turned to Amazon.

Searching for 40w edison bulbs (I have a five-fixture lamp. I don’t need 60w x 5 bulbs in there), the cheapest I found was from Longyee, offering six bulbs for $14 (correction 9/20/17: now up to $16). Of course, at the time of this writing, they only have one rating, but at least it’s for five stars.

If I drop an extra $2, though, I can order them from Fulton Illumination who offers six bulbs for $16 and has 244 reviews. And for what it’s worth, you can get 60w bulbs from them for $19, if that’s more your speed.

However, if you need 60w bulbs for adequate lighting, why not try the 6-pack from Deneve for $12.50?

Frugality is the name of the game, folks. That’s why I’m here. Still, our shared goal is creating art, and there is something about a well-lit creative space that

Enjoy your new space!

Best deals on sound boards for studio AND live sound mixing

This mixer has 8 XLR and 8 instrument-level inputs. For $400. And it’s all digital mixing in-the-box with USB output for the computer.

What a great deal for a sound board that will run live AND studio setup!

http://amzn.to/2gVOcx4

Get it, son.

Note: the down-side is that you will actually be doing all of your mixing from an iPad or Android device. However, you’re probably already using one of those, right?

And for an extra $50, you can have all 16 channels dual-purpose: XLR or instrument.

What a beautiful world we live in:

http://amzn.to/2vNMpRa

Peace.


I could drag this out. I could write on this for ages, comparing about twelve “budget” boards. But why would I do that? I don’t want you to buy twelve boards. Dangit, just buy the best one to start out with, and go from there. It’s that simple.

I saw a four-channel USB board for $180, but upon further reading, it turns out that the USB only outputs one copy of the Master track, not even the four separate tracks separately. An interface can do that with a DAW for your board. Stop wasting money. Buy one of the above boards. Trust me.

Getting Started: Gear You Need

The best recording gear is free.

When I was getting started recording, I wasn’t sure which part was most important: the recording software to make it sound incredible, the studio rack full of flashy lights to make me look professional when I shoot videos, or a website to advertise my work and distribute my songs to millions of adoring fans. I mentioned my dilemma to an artist who’d spent some time in professional studios, and she told me the following: “dingbat, the gear you need starts with a good mic. Borrow one from the church if you can’t buy one yet.” Which leads me to our first story time together:

Once upon a time, not so long ago, there was a set of three basic cardioid vocal microphones for $30 on a variety of websites and in magazines. The mics were made by a relatively-well-known company, not terrifically popular but enough that if you saw the logo, you’d say “yeah, I’ve heard of them.” You can’t expect high quality from a $10 microphone, but if you need some backup mics to keep around, it was a pretty unbeatable deal.

I’ll be honest with you: for vocals, the mics are awful… especially when used “correctly.”

By “correctly,” I mean “with you standing in front of it, speaking or singing in a normal way.”

They catch every plosive sound: every ‘p’ and ‘b’ add a forceful ‘pop’ to your sound. They tend to muffle your voice, so unless you have an EQ consisting of more than three knobs, you’re not going to be able to dial in some clarity on that mic. I was asked to sing for a wedding, and when I got there, the sound system they had featured one of these mics. I tried, I mean I really tried to use it. The truth was that it just wasn’t going to sound beautiful on her wedding day… so I swapped the mic.

But I’m willing to bet that your local church has a set of them laying around in a closet. Hint: they come in their own hardshell case.

And if they don’t have those mics, then they probably have a spare one somewhere that you can borrow.

(For what it’s worth, those mics can be used creatively: dial up the gain and use them as overhead drum mics, or add just a smidge of gain and speak/sing across it at 90 degrees to catch that “in the room” sound — they won’t work for direct vocal clarity, but they’ll definitely work if you re-imagine their purpose a bit.)

I guarantee that you could approach a local church, bar, club, or even a local band and say:

“Hey, I’m thinking about getting into [voice acting / podcasting / recording music / making YouTube videos where I put words behind my dog’s stupid faces], and I’d like to try it out before I buy a bunch of equipment. Do you have a spare microphone I could borrow for two weeks while I decide if this is something I want to pursue?”

You’ll likely generate a discussion about your project, but more importantly, you’ll almost-certainly start to build a business relationship beneficial to both of you down the road. It never hurts to “know a guy” who can help with something sound-related. Build your network early, padawan.

Interfaces will be harder to come by, unless you already know someone who does some recording work. Thankfully, those are one of the cheapest items to obtain to start out with, and it never hurts to have a spare one laying around, either as a backup or as part of a traveling rig you keep in a suitcase somewhere.

The rest, though, should be easy to beg or borrow from connections. A mic, mic cable, even a mic stand if you want: lots of places will have one not-in-use, or at least one you can use until Sunday morning.

The next-best thing is cheap-but-brand-new.

Of course, you’re on this site, so I assume that this is what you’re looking for. If you want to break into home recording without breaking out the piggy bank (or a savings bond), you can get:

That’s a full recording rig for beginners for only $65, and basic recording software is free. Within a couple of years, you will probably replace everything in that list. Thankfully, you can get a boom stand for your mic for under $20, if you want to stand while recording or if you want to move your mic down in front of a guitar amp (because, repeat after me, children: we always elevate guitar amps and put them on some sort of padding. Amps on wood floors resonate against the floor and sound different in the room than they do in the recording and you will drive yourself nuts trying to figure out why it doesn’t sound right).

I’m also going to recommend that you spend your next $50 immediately after you get your first recording rig. Why? Because analog tubes sound awesome: they’re warm and real. Your interface is capable of and will initially be set up to both power your mic and accurately capture sound from it, converting the analog signal into digital signal for your computer to store. You can power your mic instead through an actual vacuum tube and enjoy the slightly-better sound for only $50 (instead of, say, a vacuum-tube preamp for $999 as is available from other fine manufacturers [go for it, these are all affiliate links…]). On top of that, the device acts as a direct box, so you can plug instruments into it to shape their sound or turn the unbalanced instrument line into a balanced mic line. It has a couple other uses, as well, but we’ll cover that more later.

So you can get a recording rig for $65, and you can improve the sound quality of anything you record for an extra $50 when you’re ready to spend the extra money. You will probably want to get some nice headphones, at some point as well, but you should be more concerned about the sound going in than the sound coming out. So spend whatever extra you feel is appropriate just to have a setup you’re happy to start with. After those purchases… well, it gets dicey.

Sound gear is infinitely expensive and infinitely customizable. You can inflate the costs of equipment in any variety of ways, and the biggest problem is that you can do it justifiably. Sure, your live sound board might have a compressor channel built in, but it would actually be better to run each channel through it’s own dedicated compressor so you can fine-tune the settings on each (unless you’re using a digital sound board, in which case, why are you even here?). A new interface might have better pre-amps built in, or you might be like me and want to get the pretty interface that has VU meters that turn red if you peak! Sure, it’s three times the cost of the rest of this setup, but it’s pretty and I like it

When you are getting started recording, you can always spend more on gear. You can seldom spend less. However, if you want to get higher-end gear at decent prices…

Consider used-but-usable.

If I’ve ever been to your town in real life, I’ve done it there and I’ll always preach:

Pawn shops, pawn shops, pawn shops.

They’re not always the best quality, but they generally know the value of what they’ve got and they’re willing to haggle a little bit. Besides, it doesn’t do them any good to keep a $1200 PA system on their floor for two years with a price tag of $700. They’ll probably let it go for $450. It’s the same with drum kits. And you wouldn’t think it would be the same with some comparably-tiny rack-mounted sound gear, but brothers and sisters, I’m telling you that they will let you have that compressor for $50-70, and that beats buying it from a retailer for $180 or on eBay for $90-120.

eBay is, of course, another option for used gear, especially if they’re listing it as a true auction. Even with minimums in place, people are willing to get whatever they can get out of their old gear. I’ve gotten guitar pedals for $15 when I needed to clean up my sound but was bussing tables for a living while attending college. I ended up giving most of those pedals away when I got a real job and upgraded my stuff, and a few of those guys still use those pedals today, ten years later.

You will eventually patch together your own Frankenstudio.

My home studio consists of the following, for vocals:

  • Two mic stands on sale from Musician’s Friend
  • A four-pack of twenty-foot mic cables, also on sale from Musician’s Friend
  • A Rode NT-1A, given to me by a friend who got a new $1000 mic and wanted to be generous with his old gear
  • A BM-700 mic from Amazon
  • An Akai EIE (not the Pro version), on sale for $80 through a now-defunct music gear site called Hello Music
  • An ART Pro Channel II tube pre-amp with built-in compressor and EQ (for the main mic)
  • An ART Tube MP tube pre-amp for the spare mic
  • A hardshell 12-unit rack from a local pawn shop, $40 (it’s a little crooked, but still works just fine)
  • A Behringer 2-channel compressor, same pawn shop, $50
  • A Behringer 2-channel Sonic Ultramizer (a type of sonic maximizer), same pawn shop, $50
  • A Mac mini, refurbished on MacSales.com for $1100 (retail $1800)
  • Logic Pro X, the Apple professional studio software, full-price for $200. It’s hard to find software on sale, sometimes, and I had a tax refund in my (virtual) pocket.

That’s it. I haven’t paid full price for any hardware over $30, and it’s taken me five years to accumulate this list.

Along the way, I’ve given away plenty of mics, many of which were given to me when others upgraded. I’ve also taken gear to my church and just left it set up, not needing it at home but able to borrow it back when I need. Besides, when you work with teen volunteers, they’re probably not going to go spend $250 on a guitar amp. I, however, bought one on Facebook for $100 and I’m glad someone at the church can get some use out of it since I upgraded.

Somewhere, in a vintage hardshell suitcase I got at a yard sale (because for some reason I’m a nut for those), I have a padded bag and a few spare mic cables. Inside that bag is a Shure SM-58 and a SM-57. They’re great mics, but when I first got the MXL 550 & 551 mic pair (again, a sale on Hello Music, which has since stopped selling gear), I put them in a bag and they’ve traveled around with me since. I’ve moved homes a few times in the last couple of years, so I know that they’re somewhere… and when I find them, I might set them up as reference mics or gift them to a friend who is thinking about getting started recording.

The point here is to start cheaply and upgrade as you go. It doesn’t have to be fast, it doesn’t have to be expensive. It just has to say hello. It just has to get you started. So let’s do this: get yourself started with whatever you can’t beg or borrow. Get started and learn as you go.

So when you’re ready, let’s look at how to get started recording from your computer or phone.

Thanks for reading. All content copyright CheapSoundStudio.com 2017, or whatever year it is. Don't steal my stuff, I have post histories to prove I wrote it first.
Shale theme by Siteturner